As you can see, it's baggy, doesn't fit at the armpit, and the sleeves don't even hit my wrists. Wanna see how I went from that to this?
You've just gotta read some more!
Ok just for the record, I'm a total amateur and was making this up as I went along. You'll get to see what I did and hopefully learn from my mistakes. This shirt was a rib knit, so I used the stretch stitch (or you could use a zig zag if your machine doesn't have this one). It's #29 in the picture, looks like mini lightening:
First, I put the shirt on inside out and pinned where I wanted it taken in. Then I drew a stitch line on, tapering the ends into the existing seam, in pencil and sewed. Here's what it looked like after stitching:
This is where my make-stuff-up-as-I-go-along comes in. In order to get both sides to match, I folded the shirt in half, lining up all seams, and put pins along the line that I had just sewn, like this:
Then I flipped it over and used my pencil (Ok, ok, I'm using pencil because I lost my water soluble ink pen!) to draw a line along my pin line. Like so:
Then I sewed it.
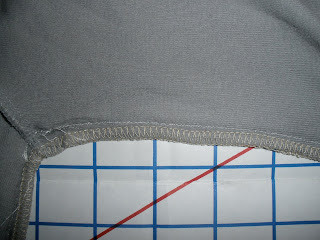
Ok so knits won't fray, but many of them will curl in the wash. This step isn't necessary, but i ran it through my serger to clean it up and trim the excess at the same time:
During this time, I'm periodically trying on the shirt to see how it's fitting and all that good stuff. During one of these try-ons, I drew a line where I wanted my sleeve to be. Add an inch for seam allowance, and chop! (I used a rotary cutter to make things faster and neater). I serged the end of the sleeve:
Then I folded up an inch and did a double row of stitching. Here's where you can learn from my mistake!! I didn't think it would be all that big of a deal for me to just use a regular needle. How different could a stretch needle be, right? Well, the answer is very. My machine was skipping stitches, making holes, and snagging the fabric. See?
Not very pretty. But, here's how it looked on, and you can see it fits much better!
 I had to try and figure out a way to cover up my ugly hemming job, so I took my sleeves that I had cut off:
Set my stitch length as long as it would go,
And made ruffles!!! (these strips are 1" wide, and I make them twice the length I needed the ruffle to be)
I started at the front center of my "V" and used as many pins as I could:
Then sewed! At this point I switched to my rolling foot to make the fabric feed smoothly.
When I was all done, this is what the finished product looked like!
Here it is on:
I hope you enjoyed my little tutorial, and I hope that it gives you courage to pull that shirt that you love but never wear because it just doesn't fit right out and try and make it work for your body!!


Wow, that's so crafty of you!!
ReplyDelete